Managing your domain through Cloudflare offers numerous benefits, including enhanced security, improved website performance, and easy DNS management. These are not the most important factors. The main reason is that you might need my help with day-to-day management, and personally, I prefer Cloudflare.
If you have a domain registered with GoDaddy and want to move it to Cloudflare, follow this detailed step-by-step guide.
Step 1: Create a Cloudflare Account and Add Your Site
- Create a Cloudflare Account
- Visit the Cloudflare website.
- Click on “Sign Up” to register if you don’t already have an account.
- Once registered, log in to your Cloudflare account.
- Add Your Domain to Cloudflare
- After logging in, click on “Add a Site” on the Cloudflare dashboard.
- Enter your GoDaddy domain (e.g., “yourdomain.com”).
- Click “Continue”.
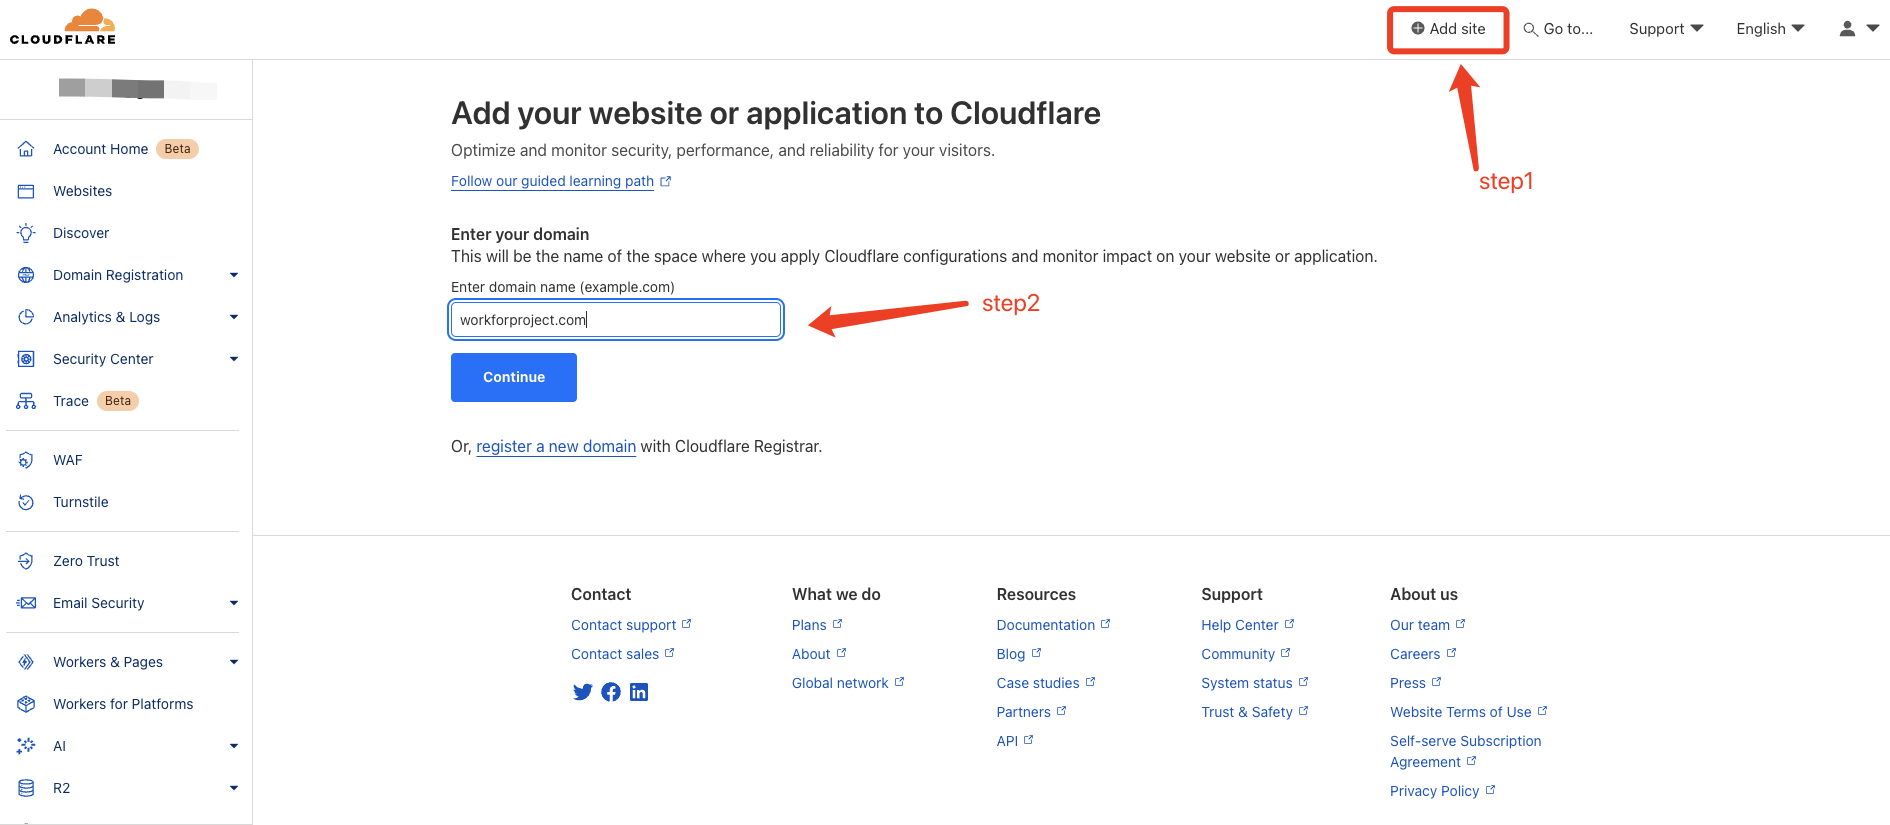
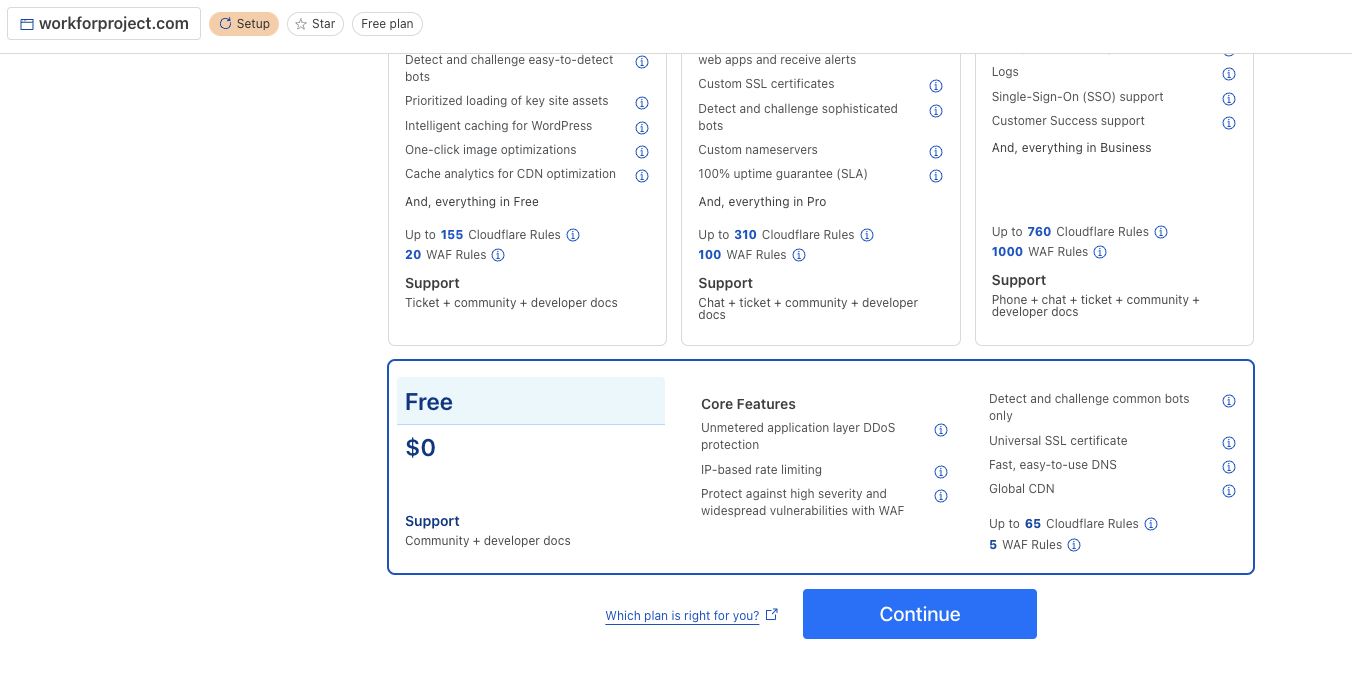
Step 2: Choose a Cloudflare Plan
- Cloudflare offers various plans, including a free plan and several paid plans. Choose the one that best fits your needs.
- Click “Continue”.
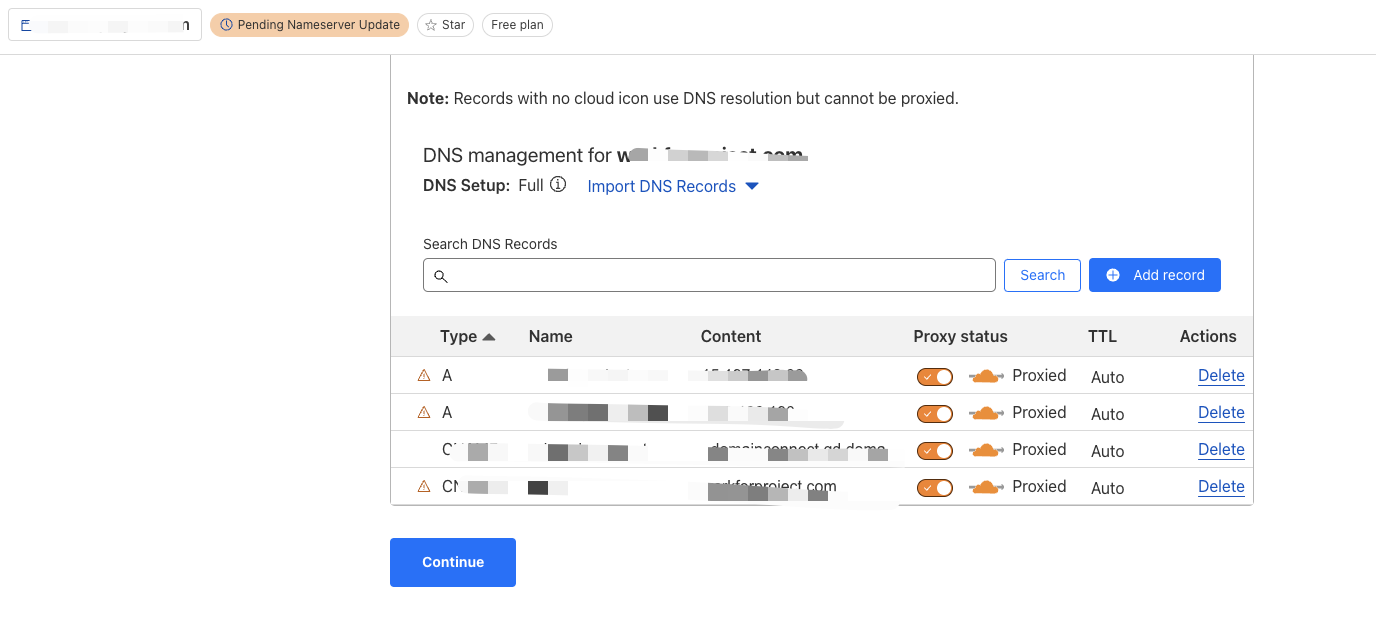
Step 3: Review and Confirm DNS Records
- DNS Record Scanning
- Cloudflare will automatically scan your current DNS records and list them for you.
- Review these records to ensure they are accurate. You can modify or add records as needed at this stage.
- Confirm DNS Records
- Once you have confirmed that all DNS records are correct, click “Continue”.
Step 4: Update Your Domain’s Nameservers
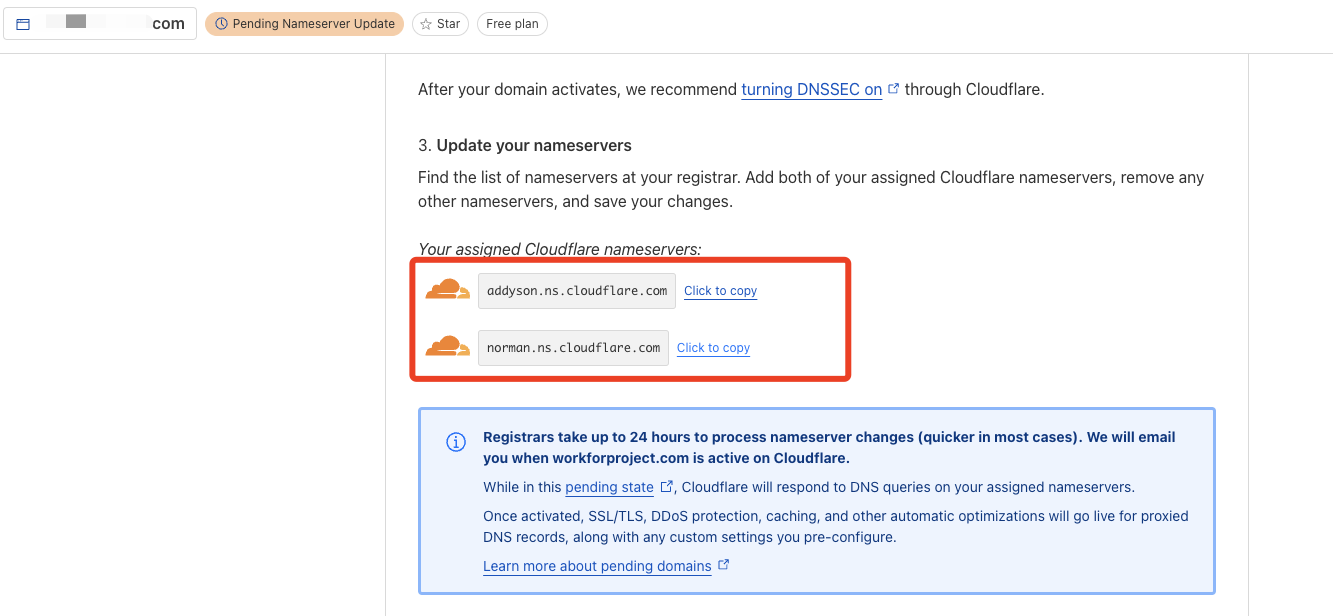
- Get Cloudflare Nameservers
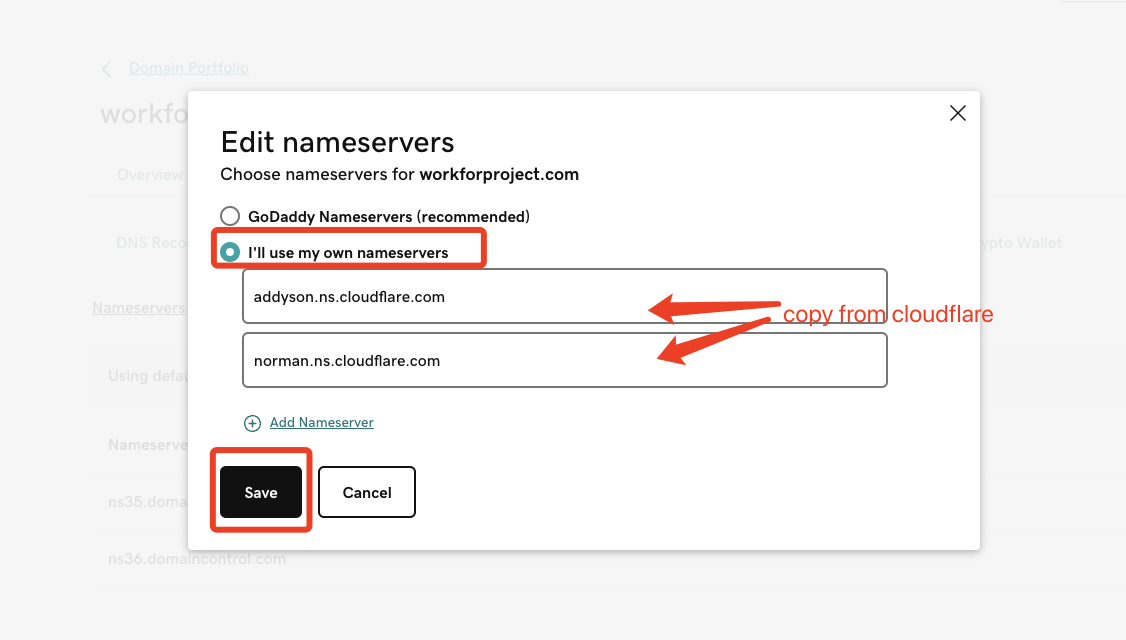
- Cloudflare will provide you with two nameservers, such as addyson.ns.cloudflare.com and norman.ns.cloudflare.com.
- copy nameservers.
- Log in to Your GoDaddy Account
- Visit the GoDaddy website.
- Log in to your GoDaddy account.
- Click ‘My Products’

- Access Domain Management
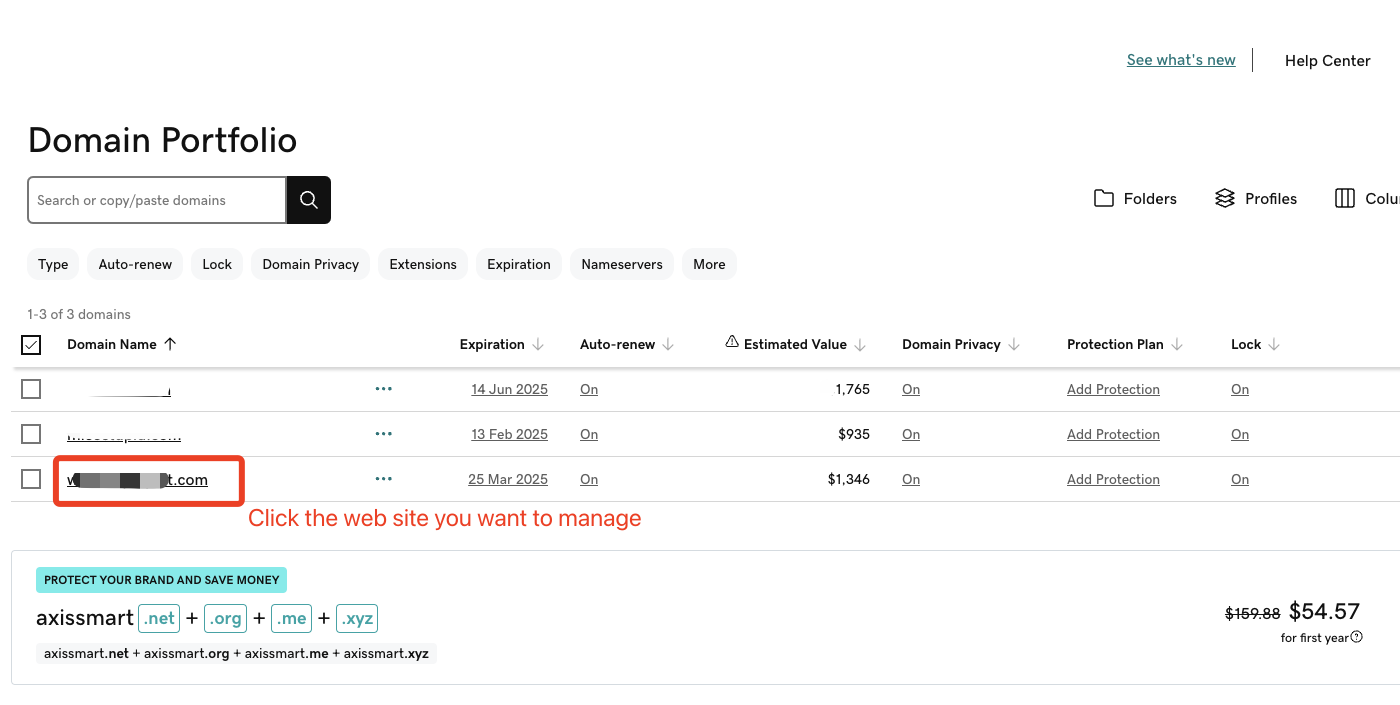
- On the GoDaddy dashboard, find and click on “Domains”.

- Locate the domain you want to manage and click on “Domain Name”.
- Change Nameservers
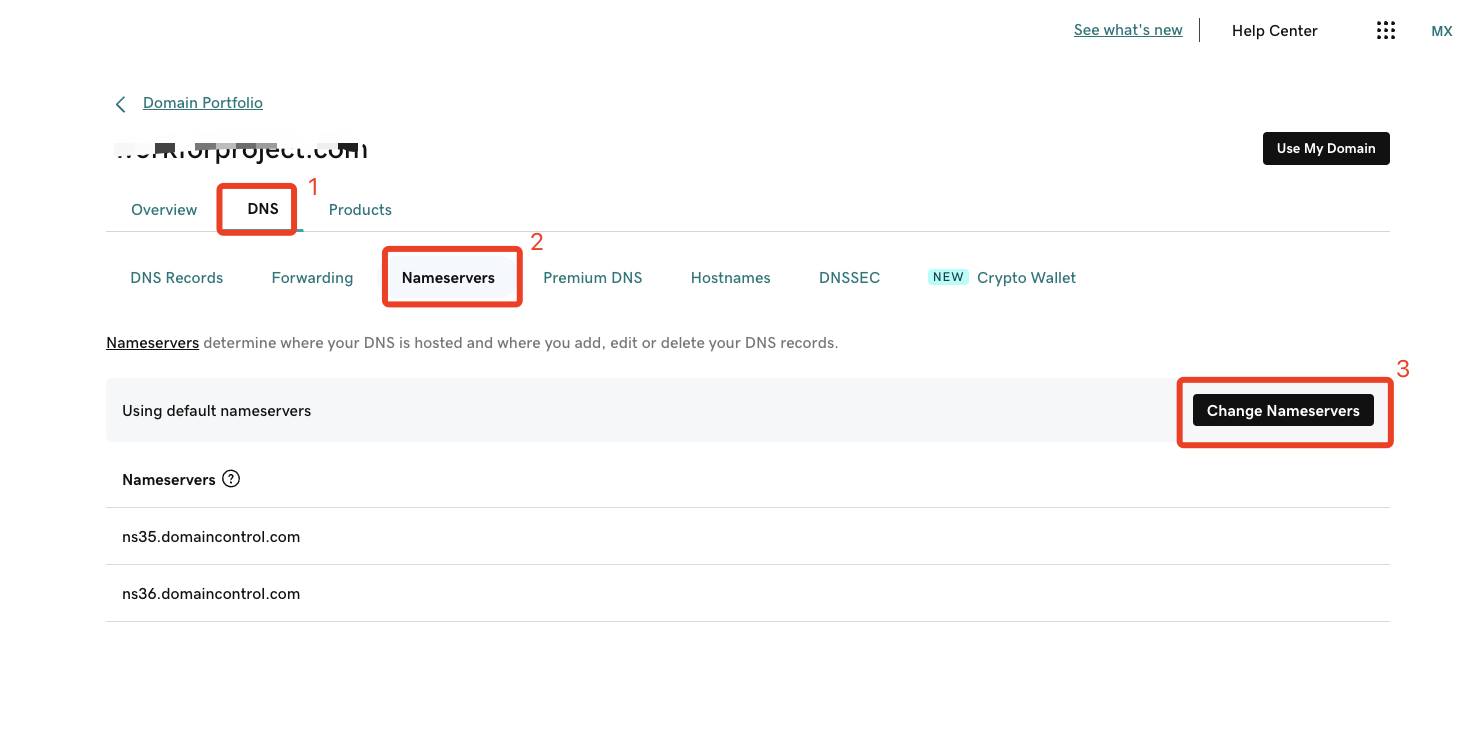
- In the DNS Management page, find the “Nameservers” section and click “Change”.
- Select the “Custom” option.
- Enter the nameservers provided by Cloudflare.
- Save your changes.
- Confirm

Step 5: Wait for DNS Propagation
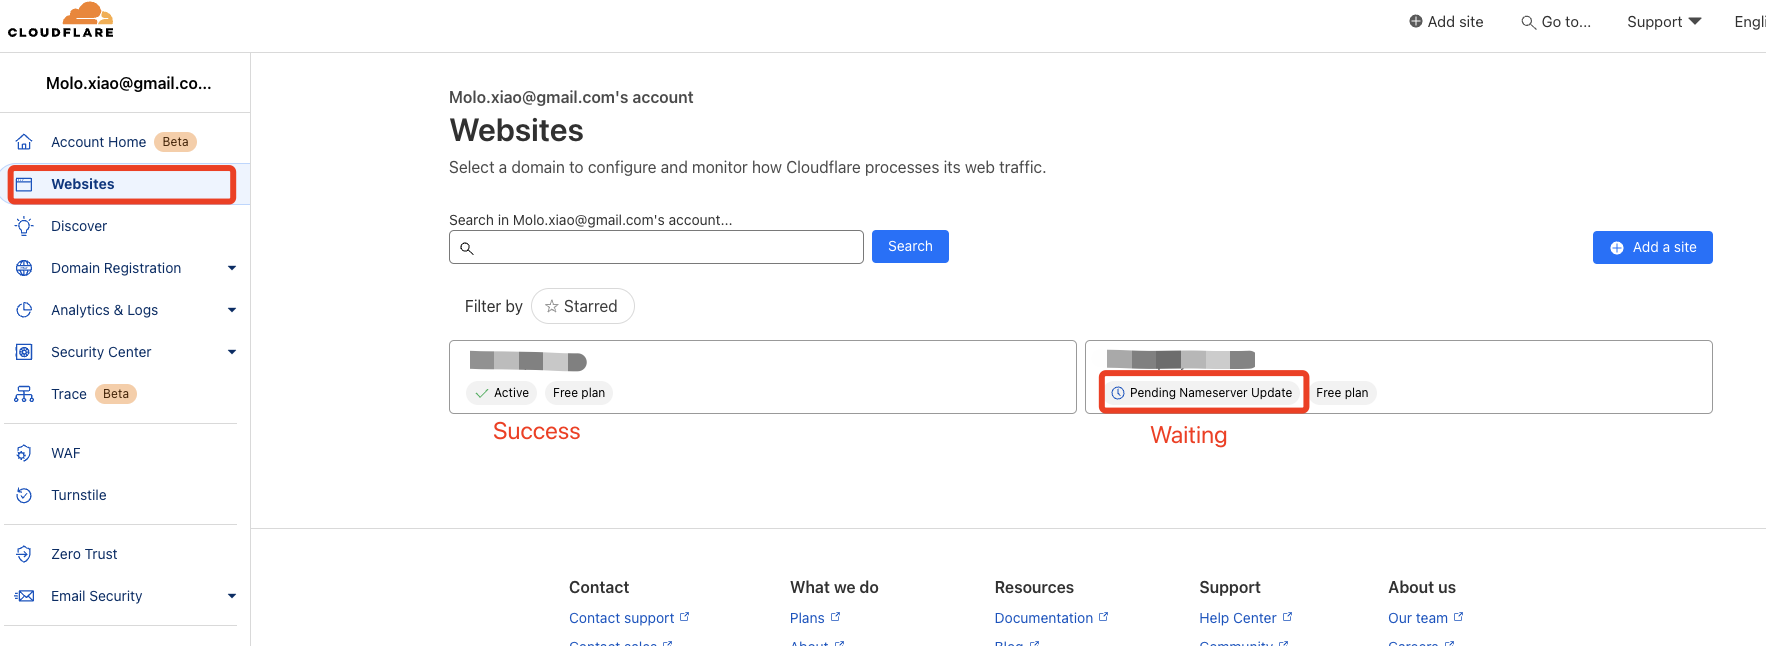
The changes to the nameservers may take 24-48 hours to propagate across the internet. I only waited for 10 minutes.
Conclusion
By following these steps, you can successfully transfer your GoDaddy domain to Cloudflare for management.